Showing posts with label Recipes. Show all posts

Tuesday, March 13, 2012

TOFFEE is delicious!! Here's a recipe and how to...


Toffee is one of my all time favorite candies. I love it in a See's box or in the form of a Skors Bar or in an antique candy shop. I could eat it all day except for the whole sugar crash/canker sore thing.


I wasn't allowed to eat candy or junk food growing up but I was allowed to attempt to make anything in the kitchen because that was a learning experience...When I stumbled across this toffee recipe in the Betty Crocker Cook Book it was like the heavens had opened up and presented me with an opportunity to make my own candy!! So make it I did. I spent many a Saturday night in sixth grade watching The Golden Girls and experimenting with this toffee recipe. It's hard to believe that something so magical only takes 7 minutes and four ingredients to make. Here's how:


This is an easy recipe in some ways but I ain't gonna lie it can be a challenge and you may need to try it a couple of times before you get it right. But it totally pays off. All of your Christmas presents will be covered every year and you'll be known for your amazing toffee abilities forever more.
Recipe:


1 cup chopped pecans (or almonds if you prefer)


3/4 cup brown sugar


1/2 cup salted butter


small pinch of salt


OPTIONAL: 1 cup Chocolate Chips


******Have a timer at your ready. There are no candy thermometers used in this recipe just your sense of smell, sight and a timer!!!!******************************


-First, butter a sheet pan and sprinkle the pecans evenly over it and set aside.


-Heat up a small heavy bottomed (tee hee) sauce pan over medium heat.


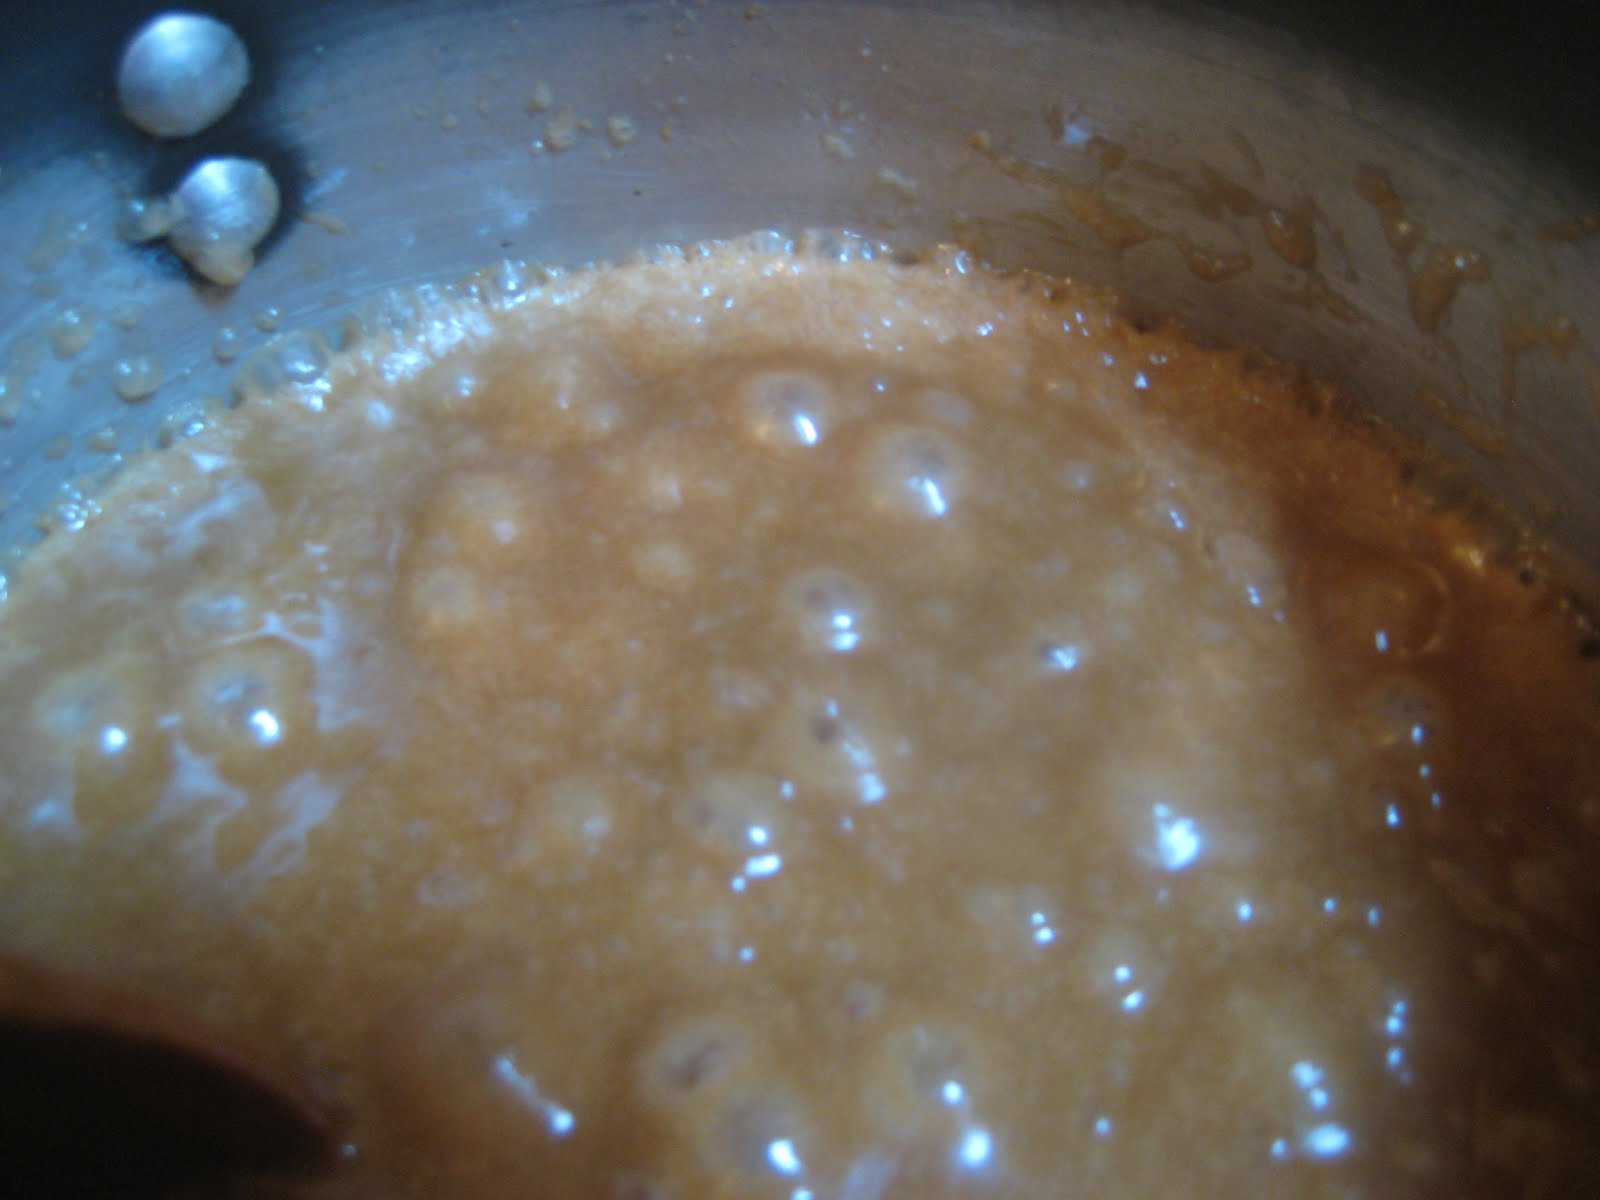
-Add the butter, brown sugar and small pinch salt. It should start melting immediately.


-With a wooden spoon mix the mixture until it is combined and bubbles start forming around the outside of the mixture. The second the bubbles start around the outside begin the timer. Set it at 7 minutes.


-For the next seven minutes you and the toffee will become one. Do not stop stirring!!


-The bubbles will start to grow angry and there will be so many of them that the surface of the toffee will begin to appear rough, especially around the outside.


TIP: If the butter ever seperates out and forms an oil in the toffee, you have the heat too high and have to start over. If, right away, the toffee becomes shiny with boils forming and popping on surface, the heat is up too high, it will either burn or become lolipop hard which is too hard for toffee. If the surface never gets rough looking with bubbles then the heat is too low and even though you mixed it deligently for 7 minutes it will only be crumbly brown sugar when it cools.


-Your nose is your best friend when it comes to toffee. Constantly smell it to make sure the sugar is not burning. If it smells carcinagenic at all, remove from heat and let cool down a bit before returning it to a bit lower flame.


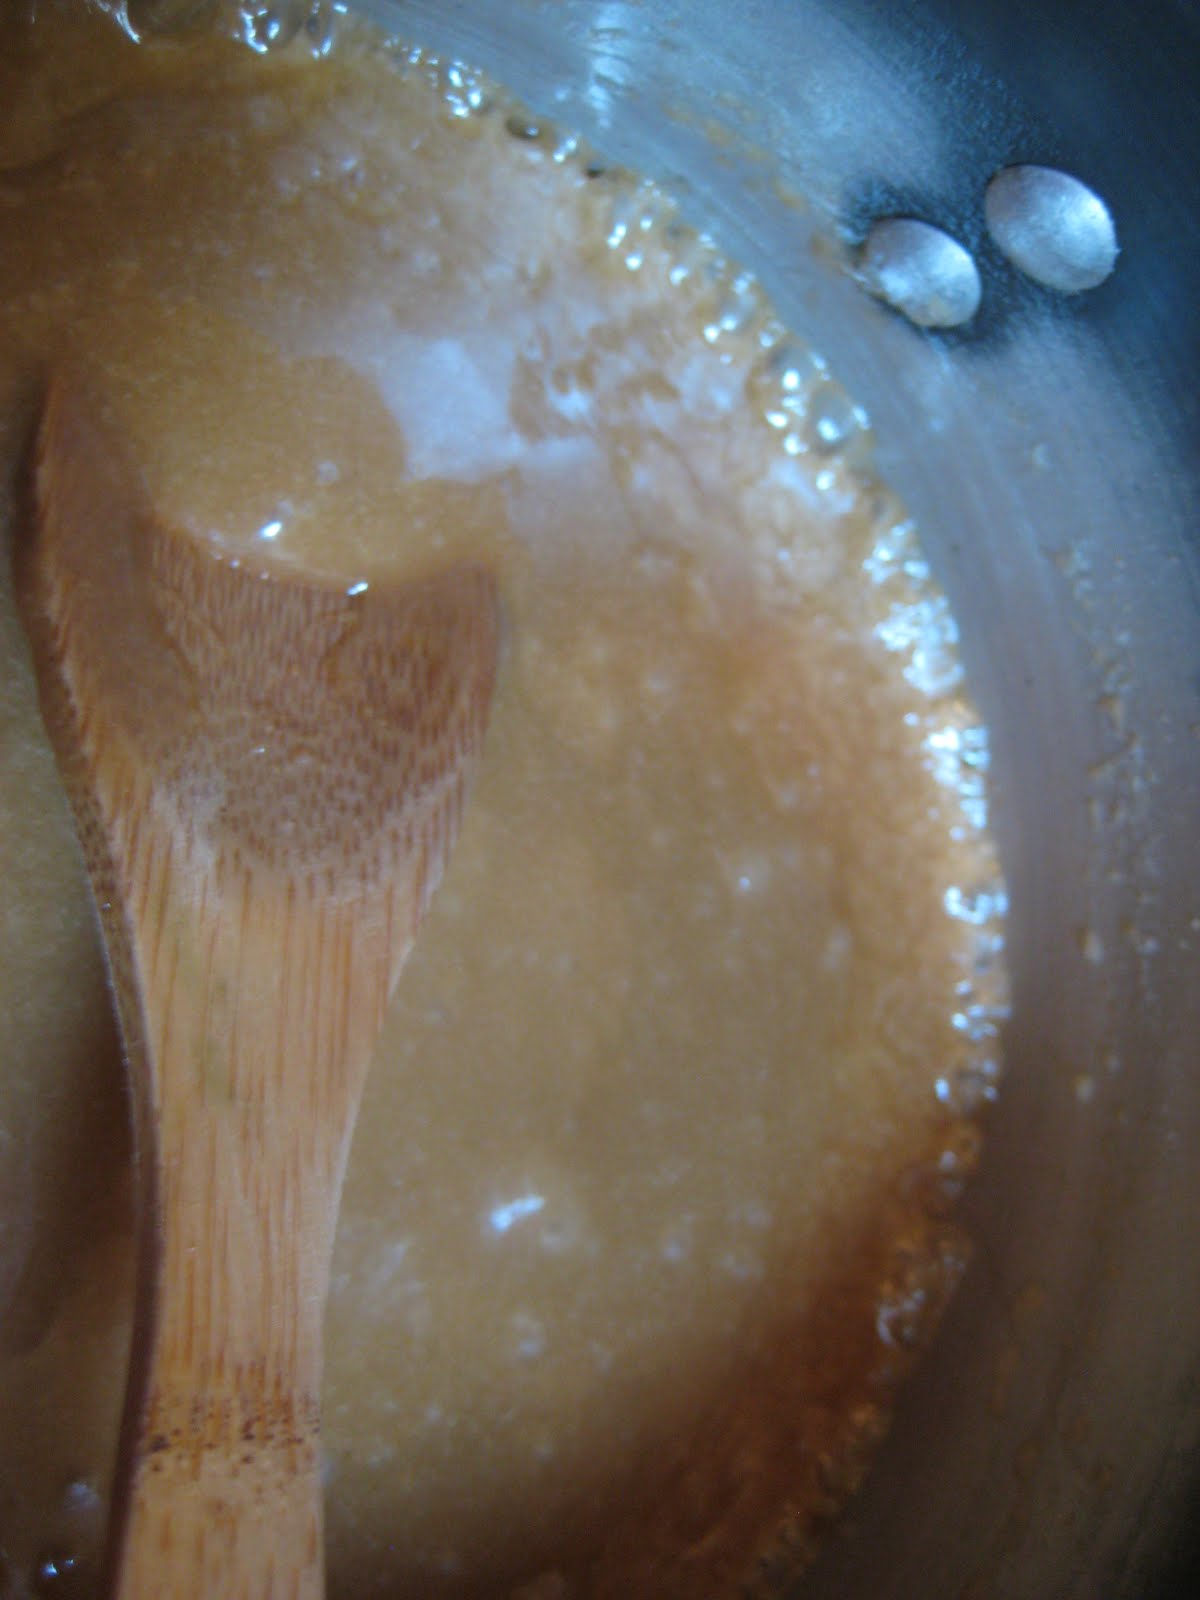
-The toffee's bubbles with get less and less angry as the toffee becomes more candy like. Around the 5th minute it will begin to get a bit more gl0ssy and just have singular bubbles in it and finally it will be shiny and candy like with smaller bubbles. Take it off when it does this. It may be at the 6 & 1/2 minute or the seventh.


-Toffee takes a lot of courage and patience. The whole time you are making it you'll be like, Oh my gosh, it's been boiling for soooooo long, it HAS to be ready. Don't give in to that seduction, just stir and stir and believe in the seven minutes.


-Once the toffee has reach the 7 minutes immediately pour over the nuts and spread it out. You know it worked out properly because the toffee will become delicious, buttery candy on the spoon. If it does not harden right away and looks more brown sugary, it will never be toffee. You either cooked it at too low of a temperature or not long enough.


-If you want it to be extra special, sprinkle the chocolate chips over the warm toffee and cover for a couple of minutes until they get soft. With a butter knife or spatula, spread chocolate over the toffee.


-If you can bare the wait, let it cool for about an hour then break it in to big delicious pieces to share with friends and family or to hoard all to yourself!


Enjoy!


xoxo


PS-It seems like it's going to rain for real all weekend therefore I will not be making pies. Sorry!! (Key Lime and Butterscotch Banana Cream Pie next sunny weekend!!!)


Monday, February 20, 2012

Whole Wheat Bread Recipe!!!


Hi everybody!

I'm so sorry about last weekend's lack of pies but I check the weather on Thursday and if it says showers it's too risky for me to bake a bunch of pies and then get rained out...But it's like, I think the weather channel thinks that blue skies with two clouds floating by should be described as partly cloudy and evening showers. But it was good timing for me because my beloved and beautiful old dog Dee Dee got a bit sick so I got to have extra time to baby her and take her to the vet. (Which, by the way, all of her blood tests were flawless. No raised liver enzymes no kidney damage!) I'll post something later that is full of advice for owners of old dogs in case anyone is curious...but for now, to make up for not having pies last weekend I am giving you all something I rarely give out--a recipe!!

I make home made wheat bread every week or so because it is so freakin delicious. Once you get used to having it around, store bought is a total drag. I bake these three loaves and then slice it and freeze it and toast it in the morning or use it for sandwiches.

Don't be scared that this is a wheat bread recipe. First of all, let's be honest, we're all thinking it, it'll totally let you eat bread and poo regularly. But secondly the key to this recipe is that I soak the wheat flour in water for a half an hour before I make it. This prevents the bread from being gross and dry and heavy. On top of that I love seeds! I put sesame and poppy and if I have them, sunflower seeds in this bread. I love seeds so much that I am concocting a seed and caramel pie that I want to call Bird's Delight. But I digress, let's get started on bread instruction.

Don't worry if you have never made bread before...You can do it!! It seems weird and scary with freaky bacteria living or dying at your finger tips but it's not that complicated. Just follow these instructions.

Recipe:

3 Cups whole wheat flour

2 1/4 cups water


1 1/2 cups whole milk, warmed to the same temperature as your finger. You will know it is the right temperature if you put your finger in it and you almost don't feel like it's even in anything because it's the exact same temp.

1/2 cup brown sugar

4 packs yeast (don't use Trader Joe's, it's not that good.)


4 tsp salt

2 large tbsp poppy seeds (plus extra for crust)

2 large tbsp sesame seeds(plus extra for crust)

2 large tbsp sun flower seeds

6 cups white flour


-Grease a large bowl with butter.
-Soak the whole wheat flour in the water for 1/2 an hour.

-Heat up milk to finger temp, put in large bowl and add 1/4 cup of the brown sugar.

-Sprinkle with the yeast, mix lightly and let sit about five minutes till it's all bubbly and fuzzy and bacteria like.

-Add the rest of the sugar to the yeast mixture and the salt, seeds and 5 cups of white flour.

-As the dough comes together in the bowl put the final cup of flour on your kneading surface, plop the dough onto it and start kneading in the last cup of flour. You may use a bit more of flour for the kneading and that's fine. You just don't want to put in too much flour or you will have a dry, heavy bread so stop adding the flour the second it stops sticking to your hands when you knead it.

How to knead bread:

As I tried to show you with my terrible one handed kneading photos how you knead dough is as follows:

On a well floured surface, sprinkle some more flour on your hands and over the top of the dough and continue to do this as you knead whenever the dough sticks to your hands. With both hands, push the dough in, fold it in half from left to right then push it in again with both hands. Do a quarter turn with the dough and repeat the process over and over again for about 4 to 5 minutes until the dough is all together, firm and a little tough feeling.
---

Place the dough in the greased bowl, rub soft butter over the top, put a towel over the bowl and place in a cozy warm spot...like a sunbeam! Don't let the dough get too hot or the yeast will die.

Let it rise for 2 1/2 hours...try not to let it rise much longer than that because the yeast starts to turns a little bit alcohal tasting.

Take the risen dough and knead it like, twice on a floured surface and leave it to rise back up for about 10 minutes. Cut the dough into three pieces. Butter your three bread pans. Preheat the oven to 375 degrees.

I like to put seeds on the outside of my bread. To make them really stick, I push the seeds into the dough to the point where the whole thing of dough is flattened out. Then I shape it back into a loaf shape, making sure the botom is all pinched together so it won't fall apart in the baking. But you can apply your seeds however you see fit.

Let the three loaves rise again for about an hour until they are totally filling in and out of the pans.

Bake for 30 minutes at 375 degrees and then enjoy the best thing in the world which is hot bread with melting butter and raspberry jam. YUM!


Tuesday, December 15, 2009

Super Duper Lemon Pie Recipe

If you love lemon this is the pie for you! I actually just got a canker sore downloading this image. It has whole slices of lemon that have been candied by two days of sitting in sugar.

Tuesday, November 24, 2009

Untraditional Holiday Pies: Tangelo Blueberry Crumble


Citrus fruit is in season in the winter and you can always find frozen blueberries so this is a great pie for the holidays. I use tangelos and navel oranges because I like the taste of tangelos, they're seedless and they sound good in the title. (I've found at the restaurant that a dessert with the word navel in it just does not sell.) If you can't find tangelos use all navel or some satsumas.


Monday, November 16, 2009

Untraditional Holiday Pies:Date Pie Recipe

This is kind of like a mince meat pie except it's not disgusting. Dates are always available during the holidays and it's a really easy pie to put together. You might think this pie would be super sweet but the molasses, nuts and raw coconut along with a pinch of salt make this pie perfectly delicious.

Tuesday, November 10, 2009

Crust 101: My Crust Recipe


Extra Tip: Remember not touching dough too much, keeping butter in bigger pieces and, most importantly, keeping everything icy cold will give you a light, flaky crust.

Pie Crust 101: How to assemble a pie


One of the main keys to flaky dough is to have it be constantly cold. If you have hot, sweaty hands it's okay...that's what flour and a refridgerator are for. After touching dough, even for a minute or two, pop it back in the refridgerator or freezer for a minute to get it to cool down.
After following my crust recipe you should have, unwrapped from saran wrap, a perfect ball of dough. Take your dough cutter doo-hickey and cut it in half placing one half in fridge. The cross section should look like a nice pastry with many layers and chunks of butter. The moisture will have distrubuted into the flour by now to make for dough that's easy to work with but there will probably still be some dry, crumbly bits you'll have to work in. Lightly sprinkle surface and top of dough with flour. Press down once firmly on the dough with your palm. Roll it out from the center until it's about 10-12 inches in diameter. Edges will most likely be uneven and scalloped and even have dry crumbly bits around the outside. That's a-okay. Take your cutter and slide it under dough and fold edges over on themselves forming a pentagon or even an octagon if you have teeny tiny hands. (see photo) Pick up pentagon and dust surface with flour again. Precede to roll out a pretty even round. I don't roll my dough out paper thin I try to keep it the thickness of a couple of pennies. Fold your dough into a square by scooping it off the surface then folding it in half and folding it again with you cutter. Immediately return to the fridge and roll out other round.
Unfold a crust round over your pan. (I prefer glass pans because they get hot enough to crisp up and brown the bottom crust and you can see easily if your pie is fully baked.) Press crust from the outside of the bottom up the the rim of the pan and seal it all along the wall of pan with your fingers. Press all along the bottom of the pan to seal it and get all the air out. If crust is slipping or is super soft, pop it into freezer for a minute. Refridgerate both crusts while you make the filling.
Extra Tip: A standard amount of fruit filling for a pie is six heaping cups. Don't have a wimpy, sunken pie, fill 'er up!
Add filling to your pie and immediately unfold top pie crust evenly over it. Press the top and bottom crust together right at the rim of pan. With your scissors cut around the pressed down radius so there's a nice even inch or so left hanging over pan. You can fold that dough over to make the crust which is the easiest way to go or you can fold the dough under and tuck it into the space between the bottom crust and pan and then seal the crust back to rim of pan with a firm push. (See photos) I usually tuck my crust under because it allows the juices of the filling to flow into the crust and flavor it.
Cut hole in center of pie that's about dime size by cutting a cross then peeling back corners. Cut slits decoratively into pie around the center hole. I don't put any cream or egg wash on my pies because I have found the added moisture doesn't allow for the immediate crisping of the crust so it becomes a little more bready. I do sprinkle my pies very liberaly with white or brown sugar. Especially on the outside crust part try to get sugar to stick there.
I bake my pies at 425 degrees for about ten minutes and then turn it down to 350 degrees. You'll know it's done when it's golden brown and filling is bubbling.


Pie Crust 101: Tools


These are the tools I use for making my pies.
- The pastry knife(above) is a funny name that doesn't seem to make sense but it does. The wires cut the butter into the flour.
-Dough Cutter Doo-hickey: I don't really know what this thing is really called I'll just call it a dough cutter. This is great for (duh) cutting dough, but also getting under the dough when you're rolling it out to reflour the surface or fold up the dough to put on the pie. I also use it to cut up cold butter.
-Scissors: To cut scraps off around pie crust.
-Spoon: The spoon I use is bigger than a soup spoon but not gigantic. It's to mix in the water with the flour and butter.
-Rolling Pin: I use this tapered rolling pin because it gives you great control with what direction you can roll in and how soft or heavy you can press. Some people just use a dowel from the hardware store but you can't get your hands around it to change directions on the dough. I don't like the rolling pin with handles because it spins around on its own and you can't get good pressure from it.


Sunday, November 1, 2009

Scary Good Dark Chocolate Pumpkin Pie


Whip It Good! Vanilla Whipped Cream Recipe

Not Too Sweet Vanilla Whipped Cream:
1 pint heavy whipping cream
2 tsp good vanilla(I use Morton & Bassett Spices Brand)
1 heaping tbsp powder sugar
Make sure your cream is very cold. Mix with an electric mixer on the highest setting until cream has thickened to the point of the beaters leaving tracks behind. Stop mixer and add the vanilla and sugar. Mix on high until the peaks stand up but not to the point where cream is fluffy but clumping together with a roughened texture. It is now about two seconds from being butter. If this happens you can add more cream if you have it to loosen it up a bit.
Side note on vanilla:
This sounds crazy, but you should spend about ten bucks on four ounces of vanilla. You may be asking, "Since when did gold and diamonds get added to vanilla?" No precious metals here, just great vanilla flavor that does not taste like rubbing alcohol. Trader Joe's and other common brands are good for the desperate alchoholic to get drunk on but bad for baking. Just treat yourself, that ten bucks will last you all year and buy you plenty of compliments.